


What to Check Before Installing a Used Excavator Hydraulic Pump
- RALPH COPE

- May 11
- 5 min read
Updated: May 12

A Down-and-Dirty Checklist to Avoid Blowing Hoses, Wrecking Cylinders, or Just Wasting Your Damn Time
So you’ve bought a used hydraulic pump. Maybe from Vikfin (good choice), maybe from some guy named “Piet” who swore it came off “a machine that only worked Sundays.”Either way—before you bolt that sucker onto your excavator and fire it up like it’s Sunday braai time—you’d better slow your roll.
Installing a used hydraulic pump without testing, inspecting, or at least mildly poking it with suspicion is like marrying someone you met at 2 a.m. at the Spur bar. Sure, it could work out... but odds are it’s going to end in tears, smoke, and a $20,000 repair bill.
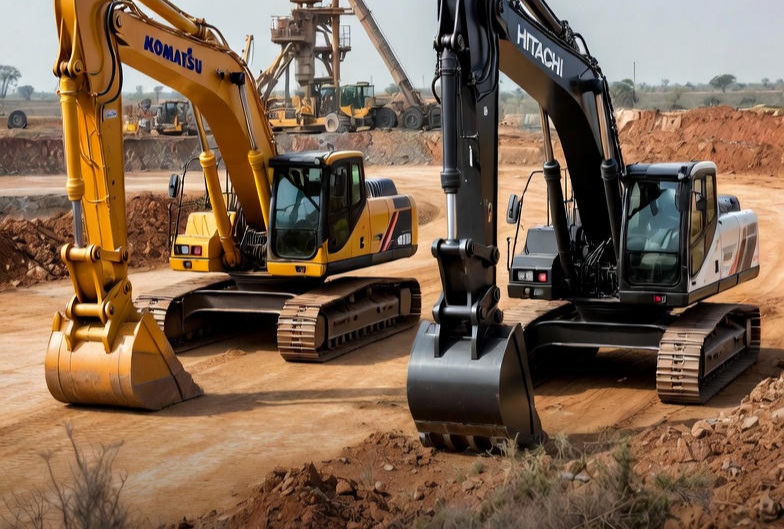
In this no-fluff, slightly sweary guide, we’ll walk you through the exact things to check before installing a used hydraulic pump—whether it’s from a CAT 320D, a Komatsu PC210, or a Hitachi ZX240. These tips will save your time, your budget, and quite possibly your entire hydraulic system.
Why You Should Care (and Not Be a Lazy Bastard)
Let’s be clear: hydraulic pumps are the heart of your excavator.They don’t just pump fluid—they create pressure. Massive, bone-crushing pressure. If a used pump is worn, damaged, or dirty, it can:
Blow seals across your entire system
Starve actuators and swing motors
Cause overheating
Kill your control valve
And eventually, send shrapnel through your hydraulic lines like a horror movie
So yeah, it’s kind of a big deal. This checklist isn’t just about peace of mind—it’s about preventing catastrophe.
🔧 Pre-Installation Checklist for Used Hydraulic Pumps
✅ 1. Inspect the Shaft – No Play, No Pitting, No Surprises
Grab the input shaft. Wiggle it. Twist it. Pull it gently (not like a maniac).There should be:
No side-to-side play
Smooth rotation with slight resistance
No grinding, clicking, or crunching
No pitting, corrosion, or damage on splines
👉 If it feels loose, gritty, or sounds like a pepper grinder, the bearings or internal components are worn. Stop. Do not install. Return to sender or rebuild it first.
✅ 2. Check All Mounting Surfaces for Flatness and Damage
Bent or damaged flanges mean trouble:
Misalignment = leaks
Leaks = air
Air = cavitation
Cavitation = game over
Use a straightedge or feeler gauge. If the flange wobbles like a B-grade soap actor, you’re gonna have issues.
✅ 3. Spin It By Hand – Feel for Binding or Notches
Turn the shaft slowly by hand.It should feel smooth with light drag—not like you’re fighting an angry ghost. If you feel binding, notches, or uneven resistance, it may have internal scoring or galling. That’s a big, expensive no-no.
✅ 4. Check for Metal Shavings or Debris in Ports
Take a clean rag and swipe inside the suction and discharge ports.
Shiny flakes? Bad.
Black sludge? Worse.
Dead insects? Gross, but at least you can clean them out.
Any contamination inside the pump can trash your system in minutes.If you see any metal, assume the pump was part of a failure and needs a full teardown or flush.
✅ 5. Pressure Test It (If Possible)
This one’s tricky without a test bench, but if you’ve got access to hydraulic test equipment—use it. Run the pump at rated RPM and check for:
Rated flow (L/min)
Rated pressure (bar or psi)
Internal leakage
Excessive noise or heat
👉 If you’re getting poor pressure or it sounds like a blender full of bolts, abort.
No test bench? No problem—just move slowly through the other steps and get advice from someone who’s bench-tested hundreds of these (spoiler: we have).
✅ 6. Check for External Cracks or Welds
This might sound obvious, but we’ve seen it all. Pumps with:
Welded casings (someone tried to "fix" a crack)
Cracked mounting ears
Hairline fractures in aluminum housings
If you see welds in critical pressure areas? Run.If you see stress marks near bolt holes? Take a second look.A cracked pump might work—for about five minutes.
✅ 7. Verify the Part Number (Don’t Rely on Eyeballs)
Not all pumps that “look the same” are actually compatible. You need to confirm:
Displacement size (e.g. 65cc vs 75cc)
Gear or piston type
Port layout
Mounting pattern
OEM brand (is it Kawasaki inside a Hitachi? Or Nachi inside a Volvo?)
Part numbers are your best friend here.No number? Grab port dimensions, mounting bolt pattern, and machine model—then call us. We can match it up better than your Tinder algorithm.
✅ 8. Inspect All Threads and Ports – No Cross-Threaded Chaos
Used pumps often come from machines that were taken apart in a panic.Look for:
Cross-threaded hydraulic ports
Missing or damaged O-ring seats
Stripped mounting holes
Even one damaged port can mean leaks, thread inserts, or needing a different pump body altogether.
✅ 9. Drain and Flush the Pump Internally
Even if the pump looks clean, it might have gunk lurking inside.You should:
Drain any leftover fluid
Run light hydraulic oil or flushing fluid through ports
Catch debris in a mesh filter or coffee filter (yes, seriously)
If you get flakes, sludge, or grit—you’ve dodged a bullet.Flush it again, or send it for a rebuild.
✅ 10. Double-Check Compatibility with Machine Controls
Modern machines often have electronic flow control valves, sensors, and load-sensing features.Ask yourself:
Is the pump designed for open or closed loop systems?
Are there control solenoids missing or different?
Is the sensor port compatible with your system?
Don’t try to “make it work.” You’ll burn your machine and your wallet.
✅ 11. Make Sure the Inlet/Outlet Sizes Match Your Hoses
Sounds simple, right?Then why do we get 3 calls a week from people who installed a pump with:
Mismatched hose threads
Wrong port angles
Reused crush washers from 1998
Measure your hose fittings. Confirm the port type. Metric, BSP, ORFS, JIC—don’t mix and match unless you’re into hydraulic roulette.
✅ 12. Prime the Pump Before Starting the Machine
Once you’re ready to install, don’t just slap it on and crank the engine.You must:
Fill the pump body with clean hydraulic oil
Pre-lube bearings and vanes
Bleed the suction side
A dry pump running at 2000 RPM will destroy itself in under 30 seconds.That’s not a joke. That’s physics.
Optional But Smart Checks
Check the rotation direction (Clockwise vs Counter-clockwise)
Measure gear backlash if you’re nerdy like that
Listen for air leaks with soapy water after install
Run system without load for a few minutes and check for overheating
Common Buyer Mistakes (That We’d Like You to Never Make Again)
Assuming it will “just work”
Skipping the flush and ruining their control valve
Installing it upside down (yes, it’s happened)
Using Teflon tape on ports instead of proper fittings
Mixing hydraulic oils and creating milkshake
Ignoring strange noises until the pump explodes
Let’s Talk About Rebuilt Pumps
We know buying a used pump is tempting. Cheaper. Quicker. Easier to find.But sometimes a rebuilt pump is a much safer long-term play.
At Vikfin, we strip pumps, inspect every component, replace worn parts, and pressure test the rebuild. You’ll get:
Guaranteed pressure and flow
Clean internals
New seals and bearings
A clean conscience
Used = cheaper, fasterRebuilt = longer lifespan, fewer headaches
Your call.
Final Thoughts (And a Quick Pep Talk)
Installing a used hydraulic pump without inspection is like base jumping with a bungee cord you found at a flea market.It might work—but if it doesn’t, you’re in deep, greasy trouble.
So take 30 minutes. Check it properly. And if you’re unsure?
Call Vikfin. We’ll guide you, test it for you, or offer a solid rebuilt option that won’t eat your machine from the inside.
#HydraulicPumpChecklist#ExcavatorHydraulics#PumpInstallationTips#UsedExcavatorParts#HydraulicPumpFailure#FinalDriveFacts#HeavyEquipmentHacks#VikfinKnowsBest#ConstructionRepair101#SouthAfricaExcavators#KomatsuLife#CATHydraulics#VolvoMachines#RebuildVsUsed#PreventPumpFailure#ExcavatorMaintenance#PlantRepairTips#HydraulicLife#UsedPartsDoneRight#VikfinPower
Need help identifying or testing your pump before install?Call Vikfin. We’ve got the experience, the inventory, and zero tolerance for junk.


Comments